How to order and build a DomesdayDuplicator
The DdD is a plug-and-play RF capture tool 40msps 10-bit ADS825 ADC & OPA690 amp with an advanced capture & control GUI.
Software is built mainly for Linux but MacOS and Windows can also be supported.
[!CAUTION]
The DdD is also suitable for use capturing many other single channel FM RF based formats, such as Video8/Hi8 & Betamax NTSC.
However, VHS, Betamax PAL and other formats require multiple ADC channels for Video RF & HiFi audio (and Baseband or Linear audio) please look at the Clockgen Mod & the MISRC for this. However the DomesdayDuplicator project does not endorse nor test any other capture solutions.
The DdD PCB
Step 1
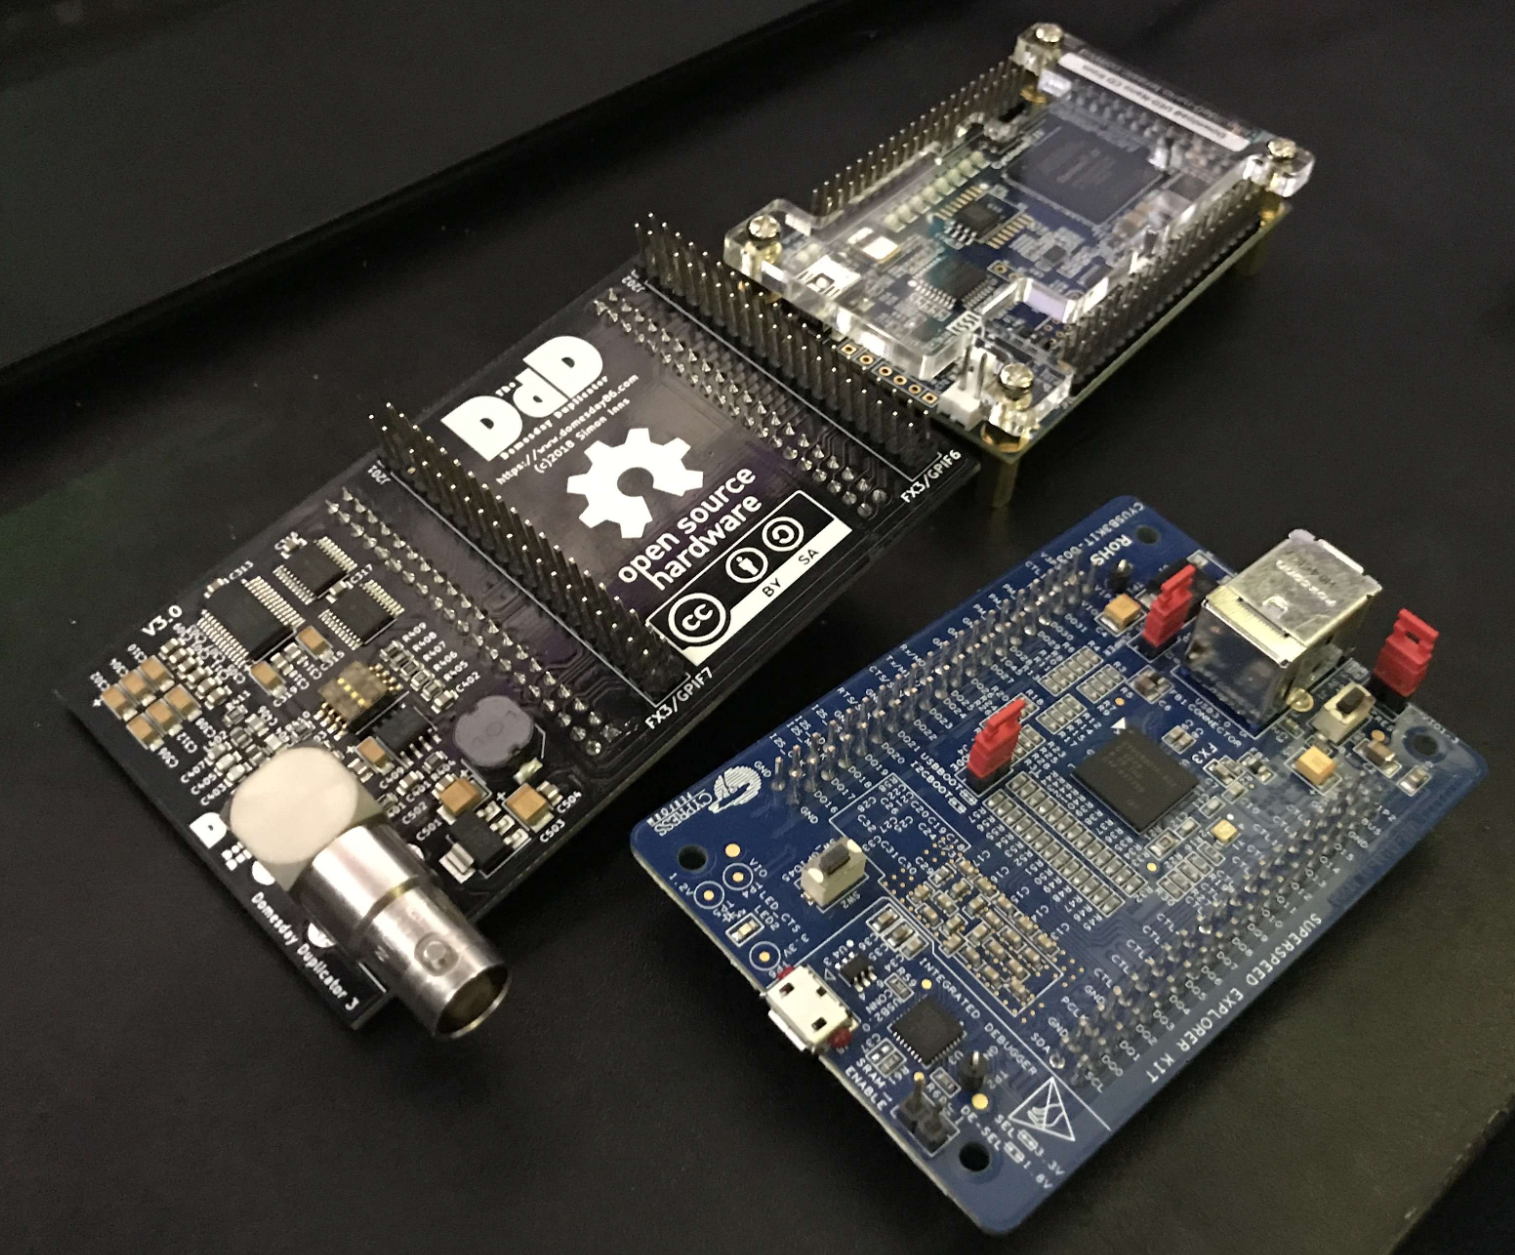
Firstly acquire the 2 off-shelf development boards.
Please do look around, local vendors can be cheaper, same applies if your with a educational institution or work for one discounts are avalible.
KIT DEV EZ-USB FX3 USB3.0
428-3347-ND
CYUSB3KIT-003
Cypress Semiconductor Corp
DE0-NANO EVAL BOARD
P0082-ND
P0082
Terasic Inc.
[!TIP]
- FX3 comes with a USB 3.0 Type-B to Type-A cable.
- DE0 comes with a USB 2.0 Mini to Type-A cable.
Step 2
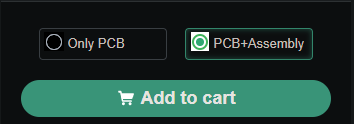
Go to PCBway Shared Project
Select PCB+Assembly
Step 3
[!TIP]
Right Click–>Open Image in new Tabto see the images fully and clearly to ensure you don’t miss anything.
You will see a order page pop up.
- Selection box 2 (highlighted in RED) should have quantity set to 1 to build a single complete DdD PCB.
- You can change the base PCB colour with changing
solder maskand text colour withsilkscreenexcluding the UV process options; these have no effect on cost or fabrication.
[!NOTE]
You will have 4 spare extra PCBs with your order, as the minimum you can order is 5 PCBs.
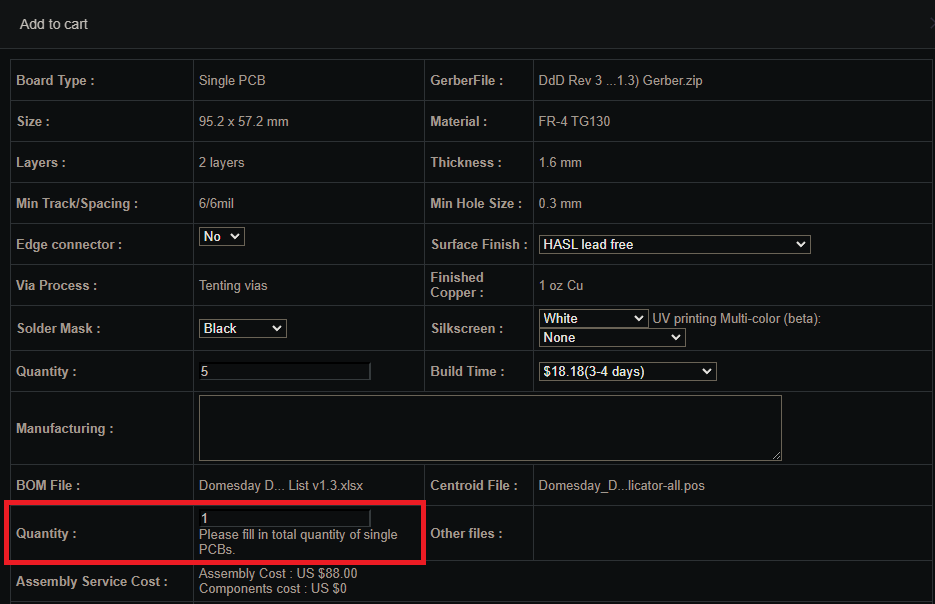
[!CAUTION]
If the box in RED is set to the default 5 units you will be quoted for 5 fully parts populated units instead of just 1 single unit, don’t worry if you make this mistake just email there support, and they will change the order for you before payment.
Step 4
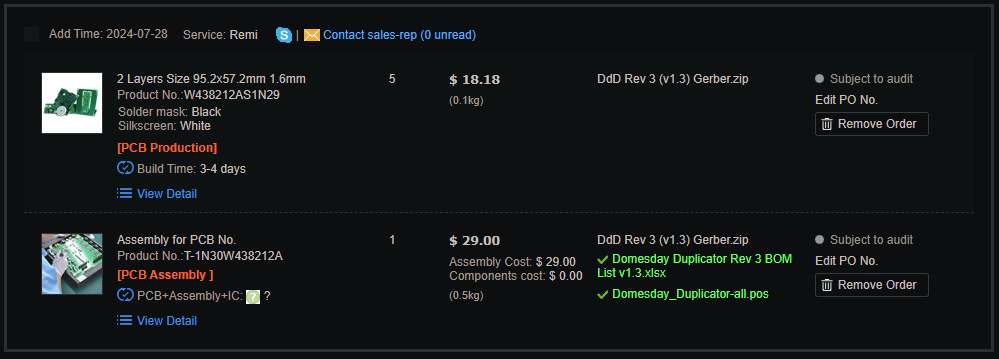
Wait for parts quote and email conformation.
Step 5
[!WARNING]
You may encounter a couple issues these will be via email.
-
If asked how many layers the PCB is say 2.
-
If issue with SRN8040-101M on pad L501, and asked to solder manually say yes, as the part will solder just fine and is for power filtering it’s non-critical as long as its got soldered contact that’s fine.
-
If issues with solder mask bridges tell them “No solder mask bridge” and or to proceed anyway, as any standard colour change will work just fine and not affect soldering of parts
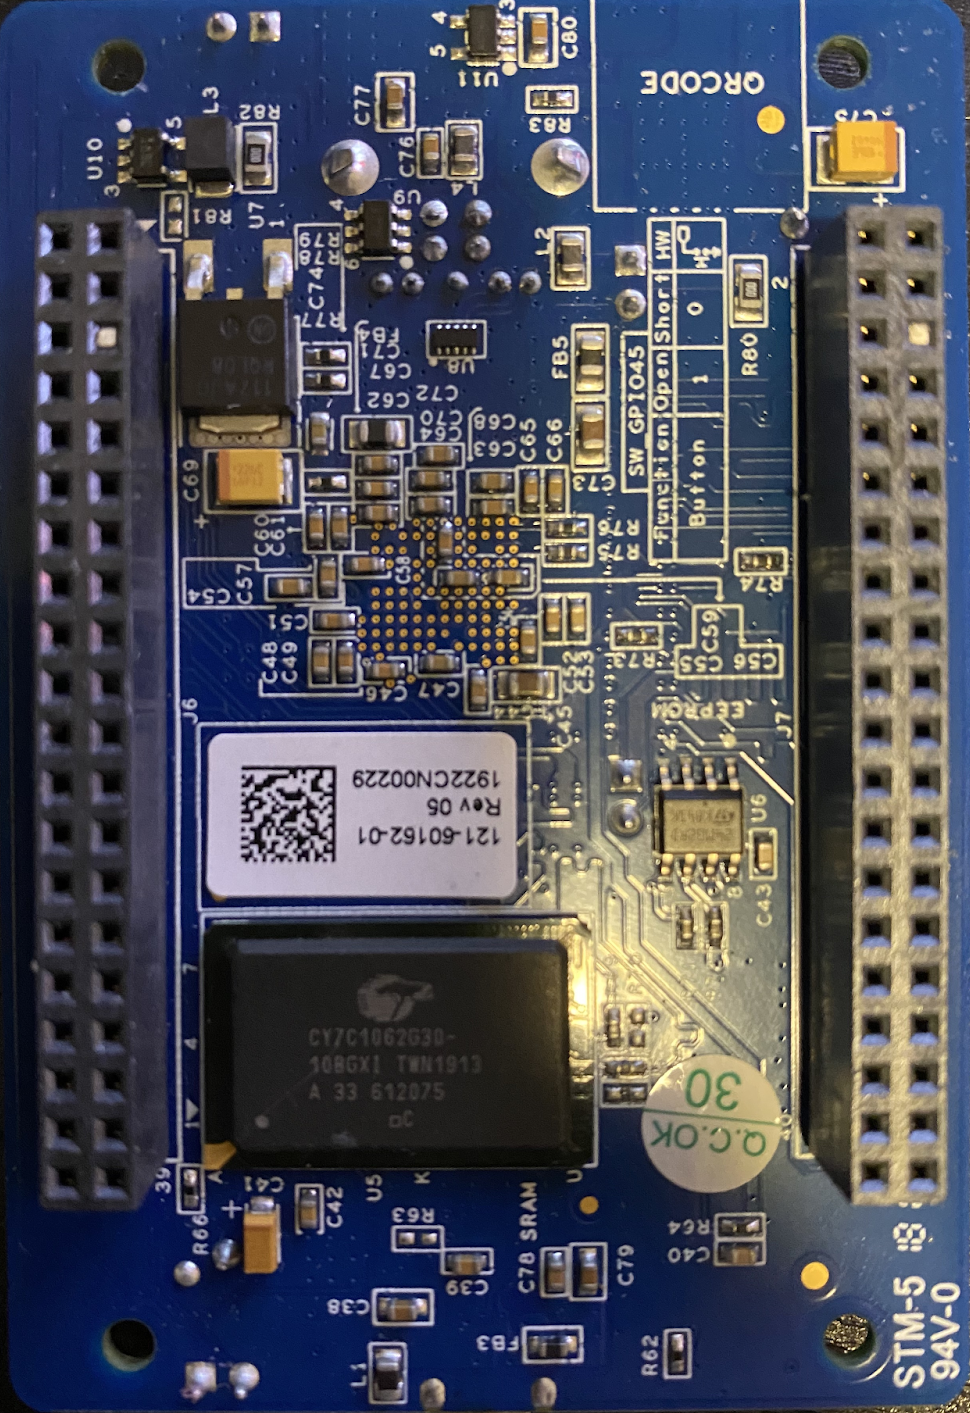
Before the PCB has final soldering done and is shipped form PCBway you will get an email with a photo, ensure this looks identical to this image below in terms of parts colour/placement.
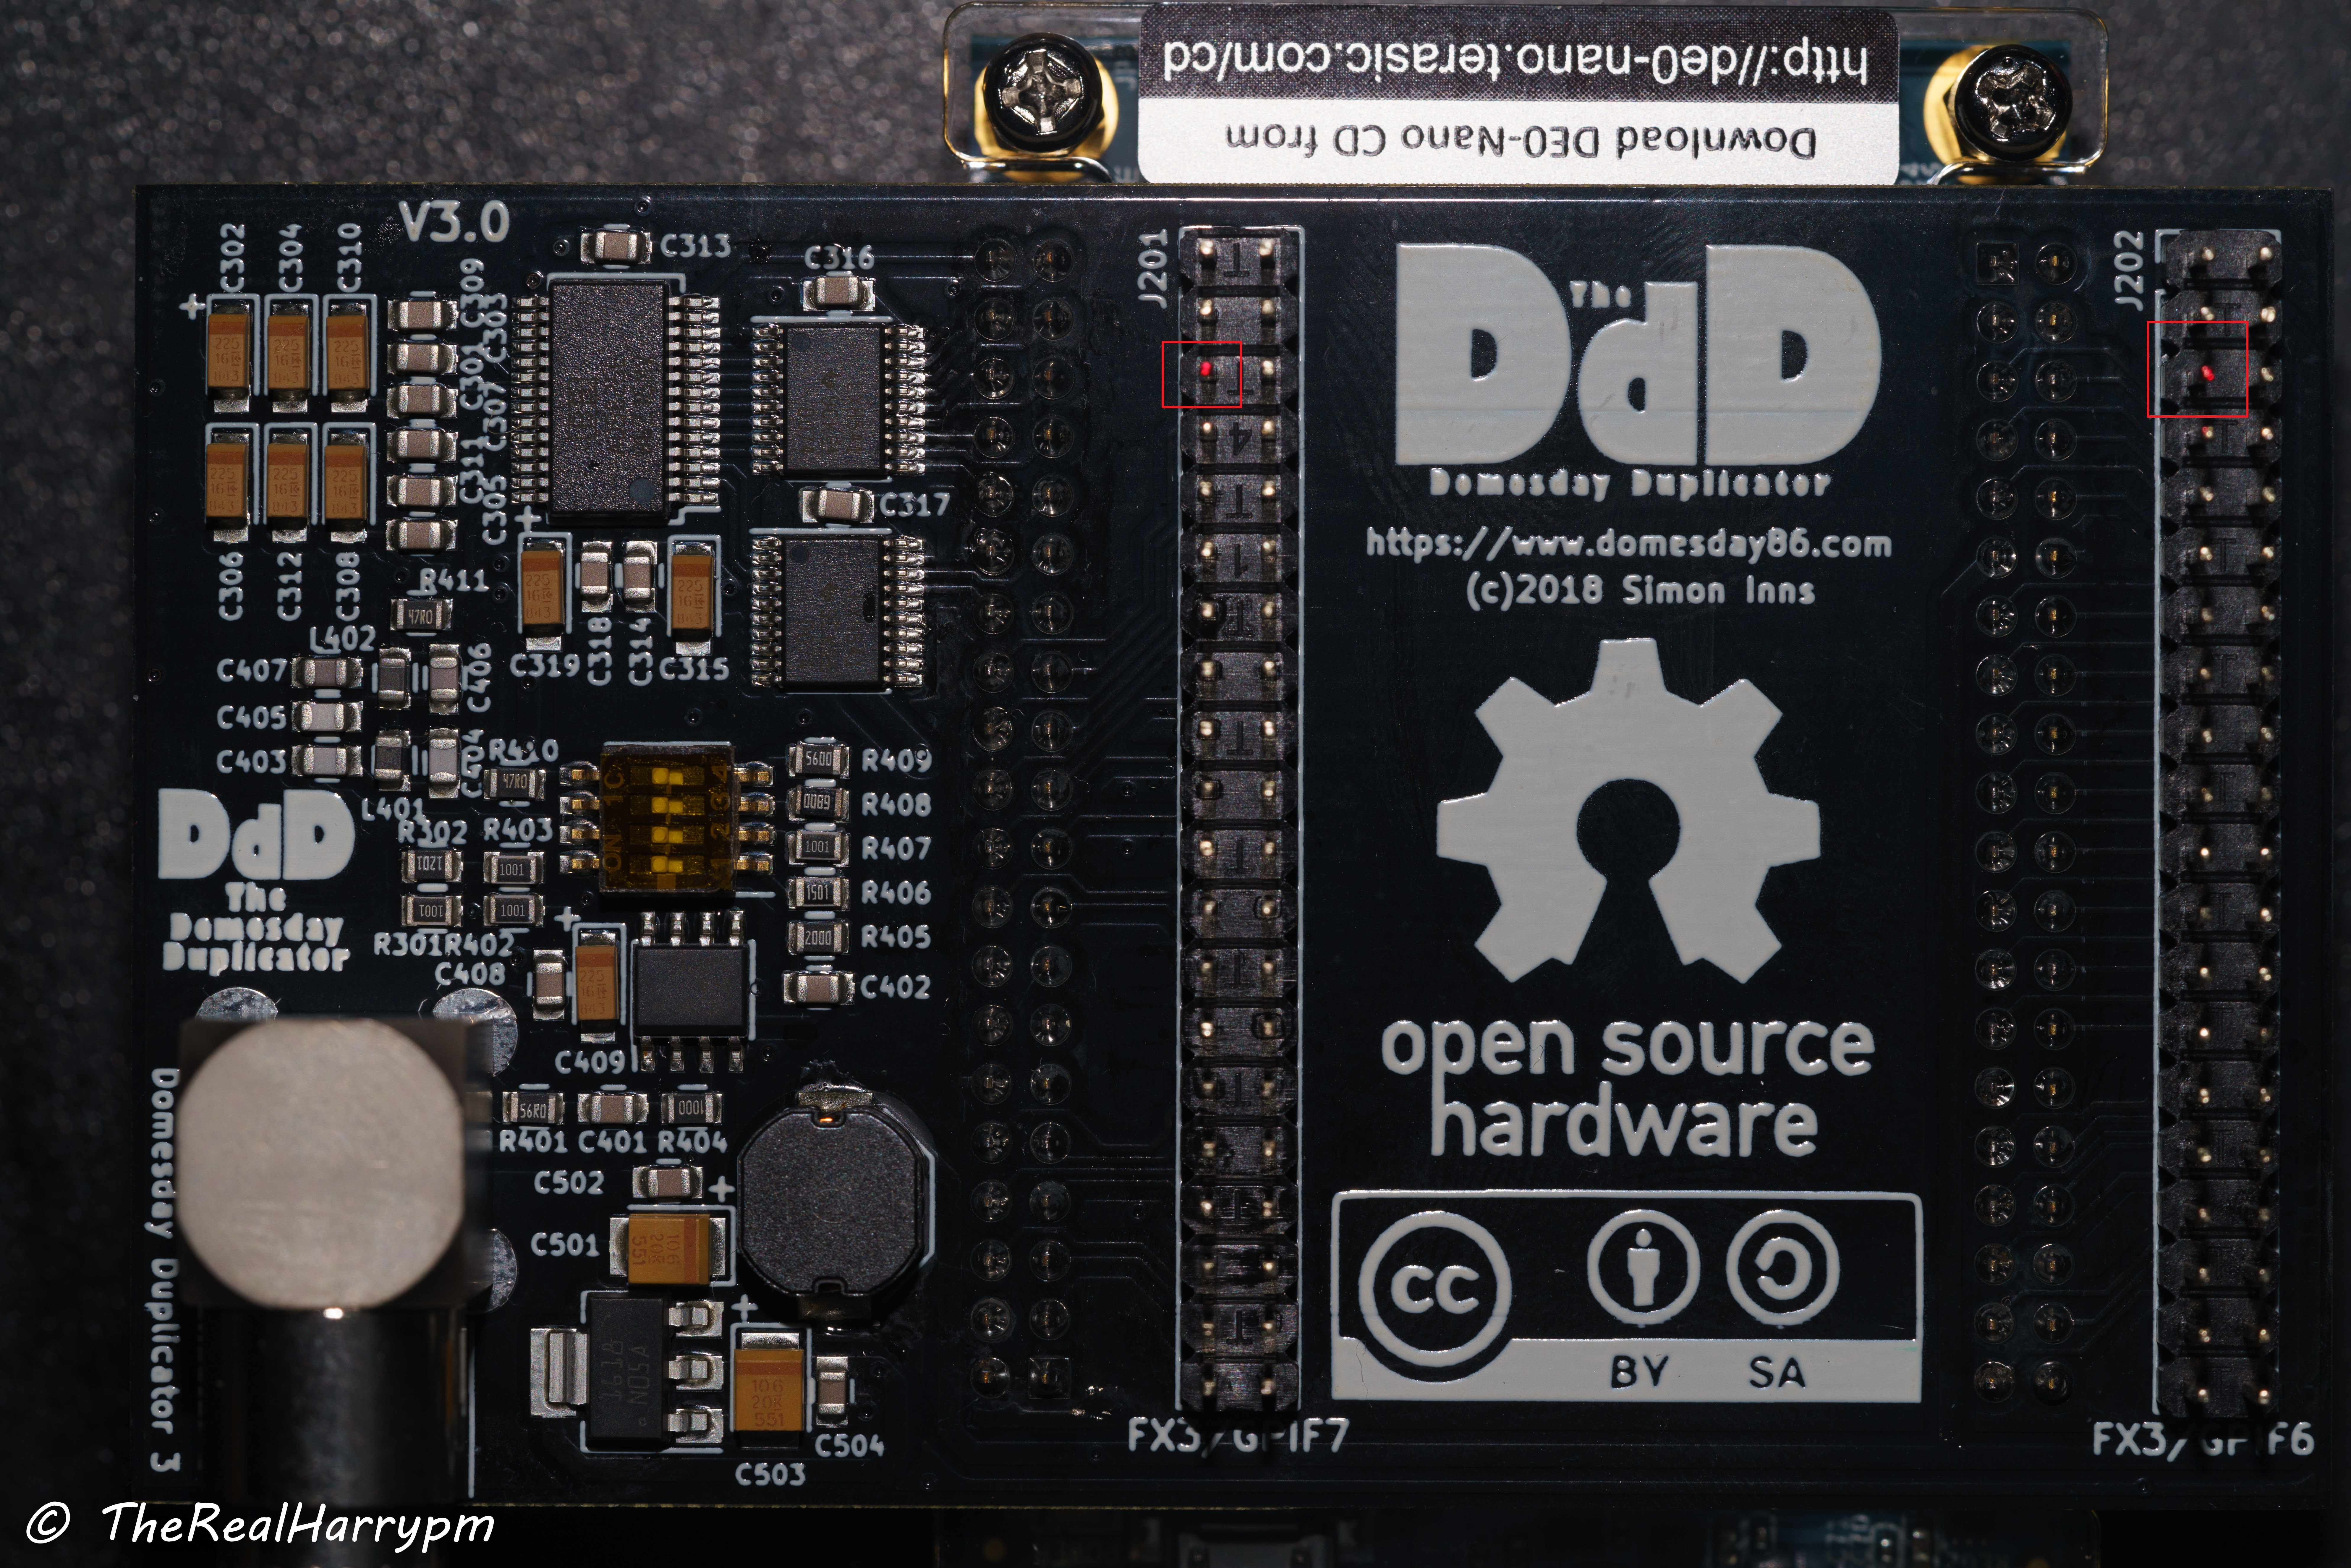
Step 6
There is two 2.54mm header pins on the DdD PCB that need to be cut flush.
Marked with RED boxes
This allows the FX3 to fit properly with its blanked out pin slots.
User Final Assembly
Don’t assemble the board yet! First, you’ll have to get it flashed - no worries, it’s really simple.
The flashing software can be done inside Windows or Linux with relative ease.
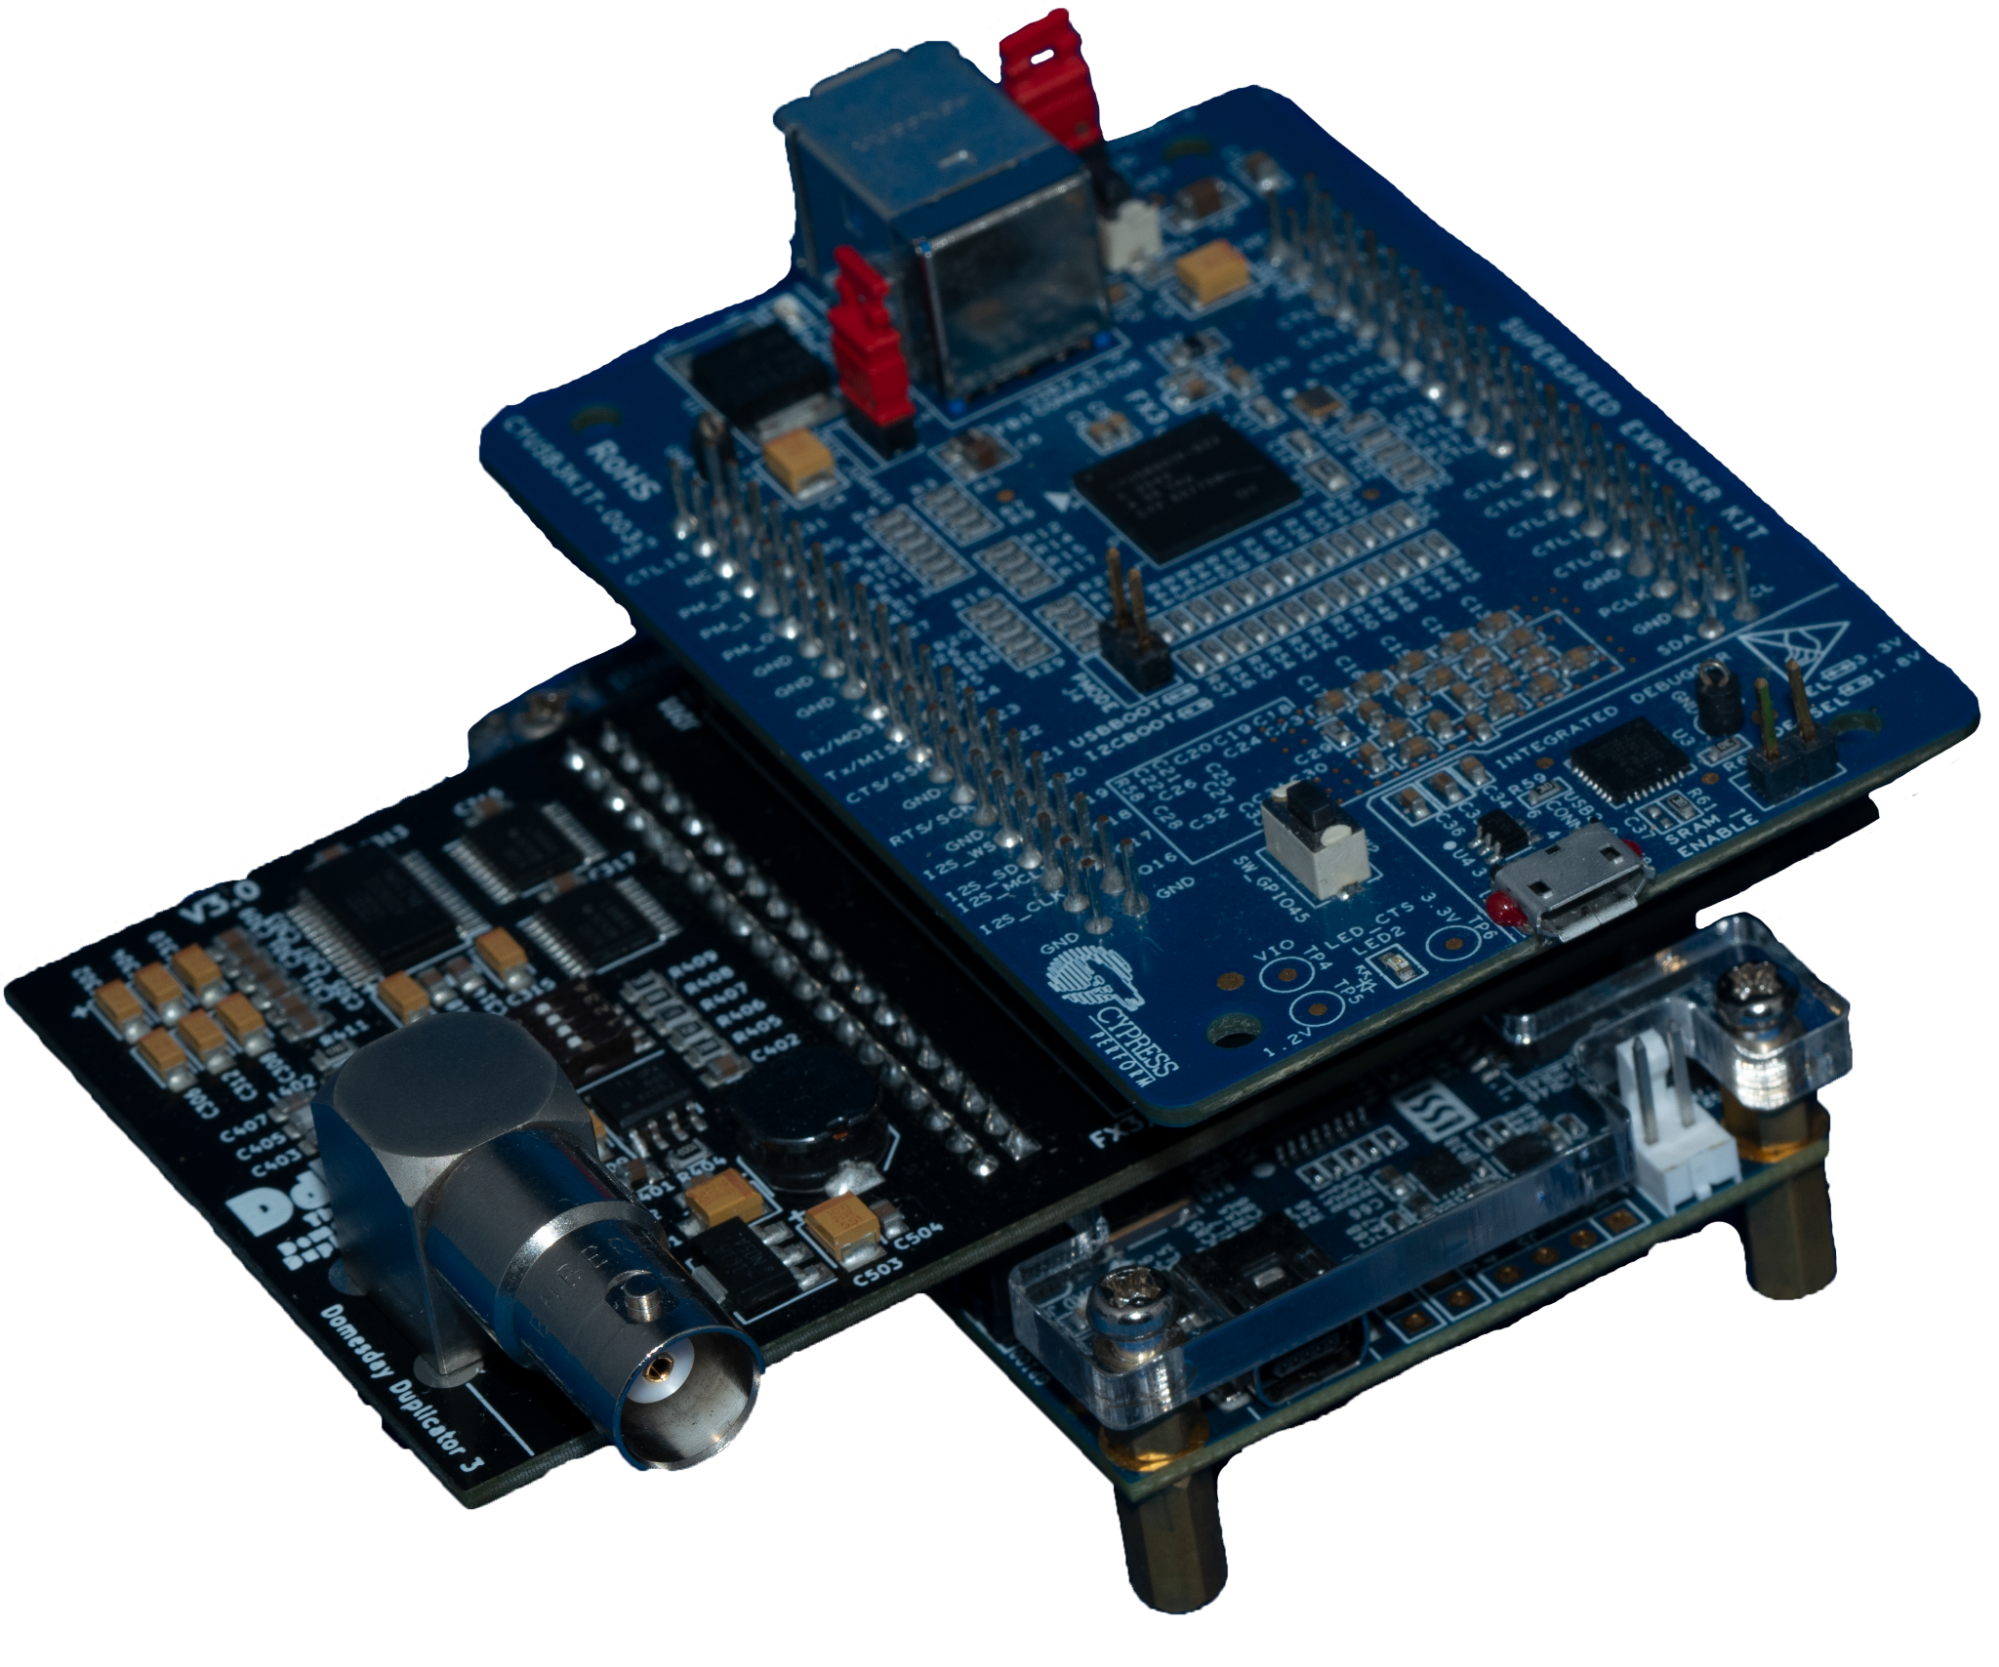
Push all PCBs together
Ensure the correct orientation of PCBS and push them together after flashing.
3D Printable Case
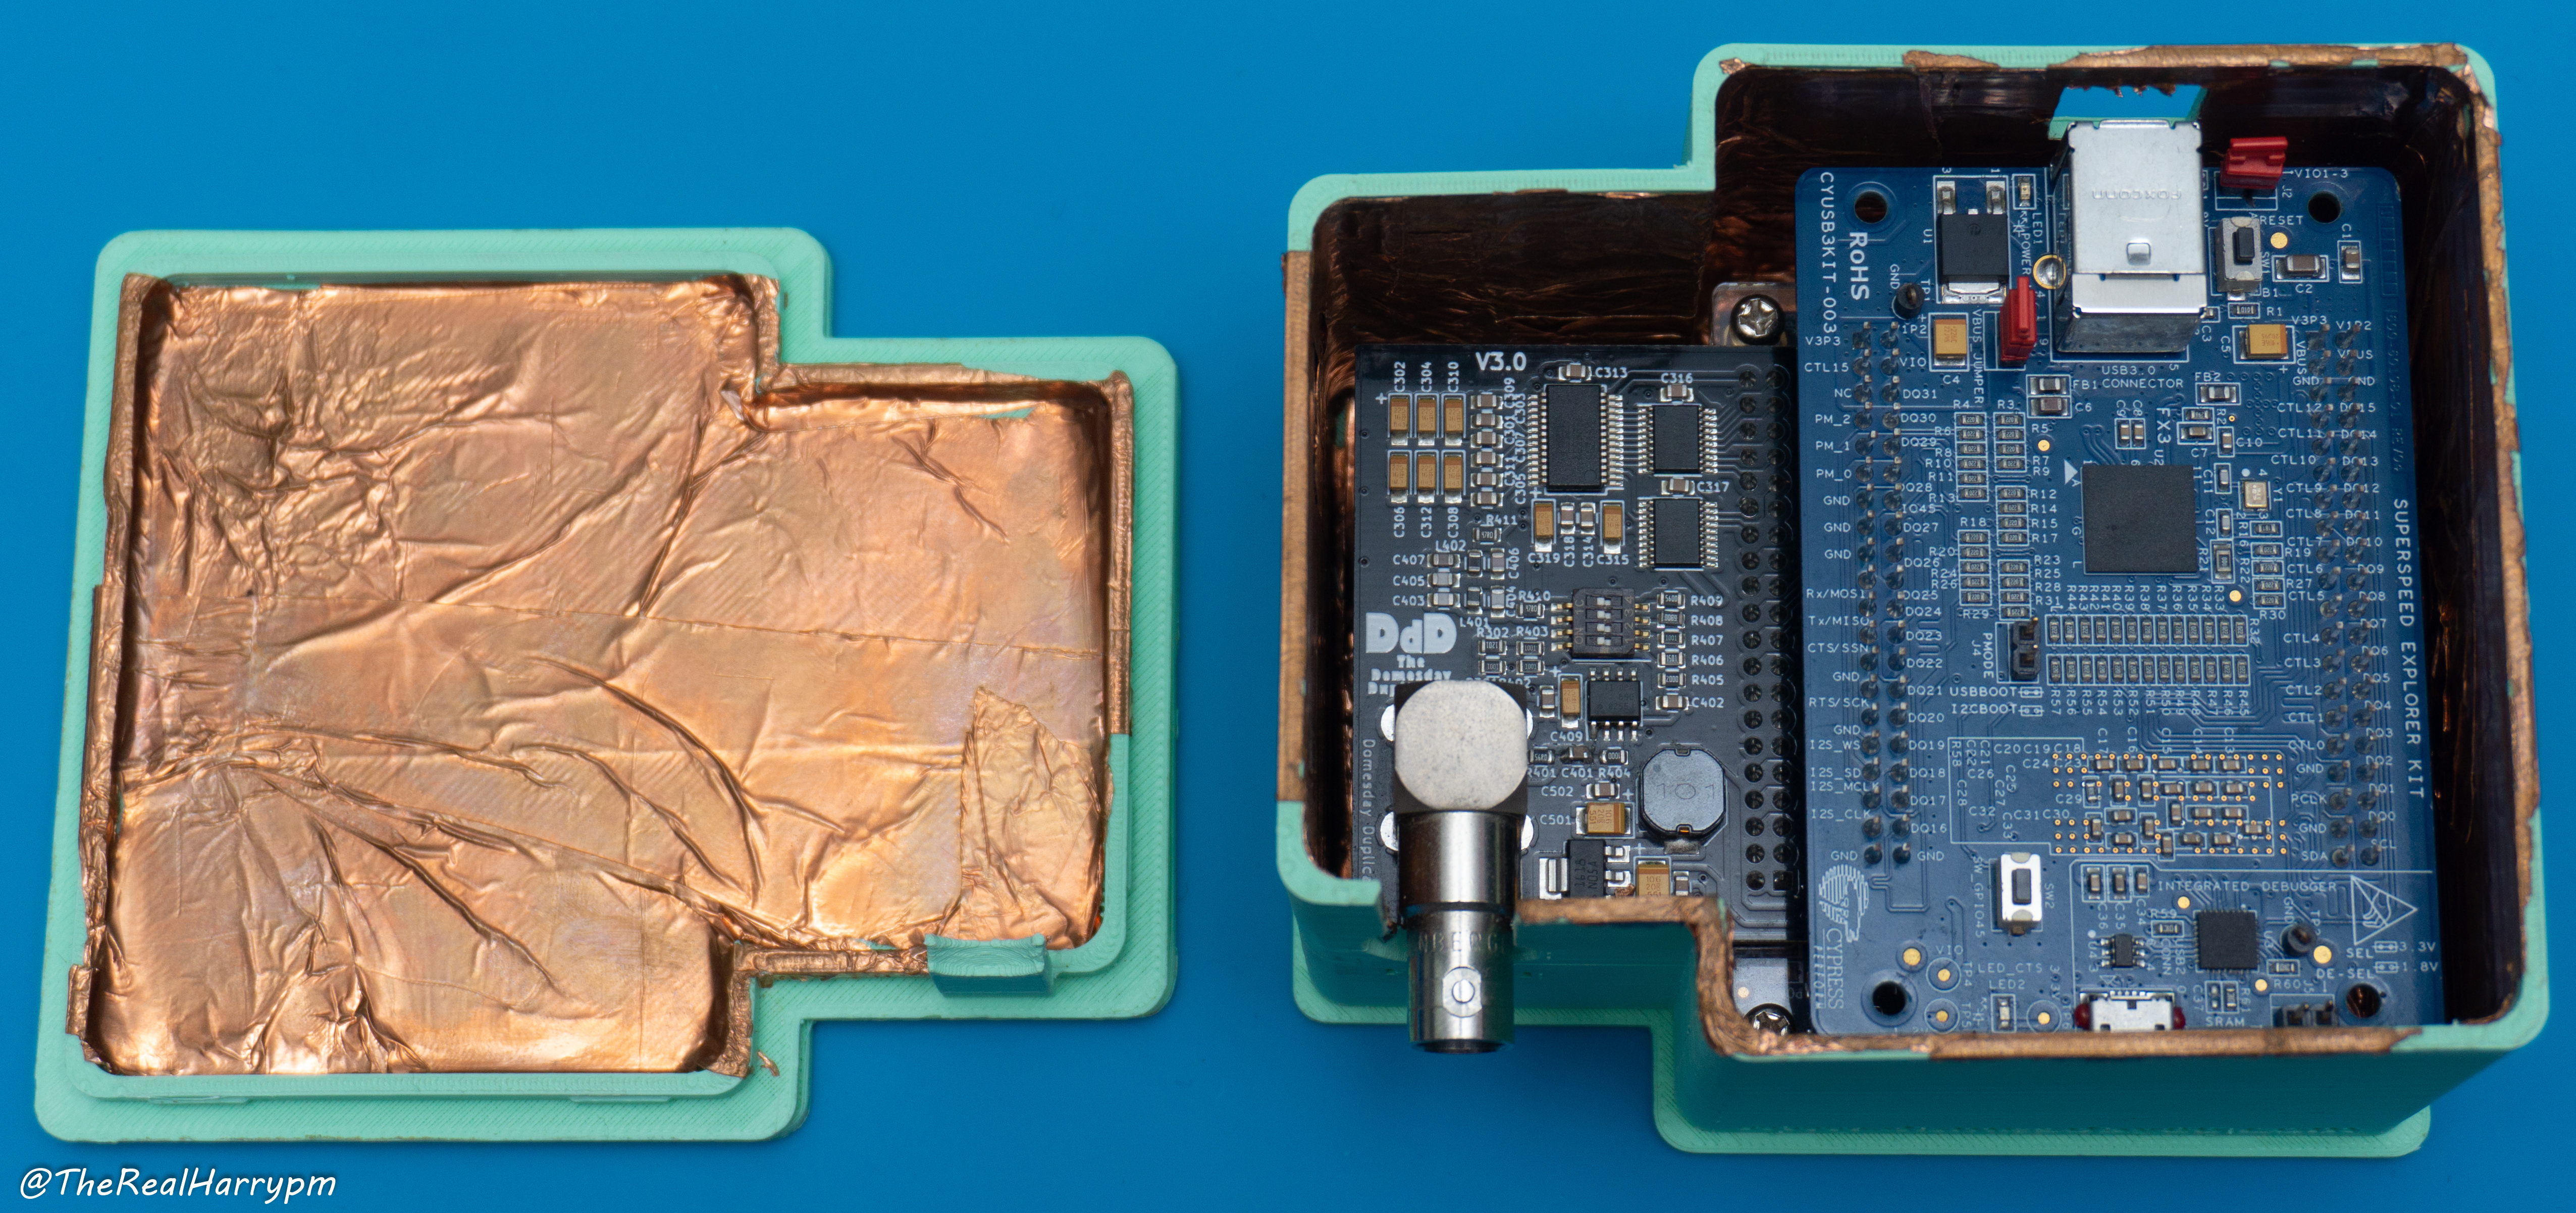
The DdD is not immune from stray RF and EMI, a shielded case is ideal to prevent this.
M3 Nuts / Bolts and a screwdriver bit or Allen key are required, along with copper tape for shield lining.
You can find SLT files in this repository & your can order pre-made shielded ones here.
Conformal Coating
[!NOTE]
This for protecting your PCB from dust and contaminate like hair strands and finger oils, but if your DdD is in a case this is mostly irrelevant.
PCBWay charges $100, and it costs $15 for a small jar. I’d recommend picking up some MG Chemicals 422C off amazon or whatever vendor stocks it in your region.
It only takes a few minutes to do a fine coat on the legs of the components. (do not cover the DIP switch)
To quickly dry its surface lift the board on some tin foil balls on a tray at 50°C in a fan oven to set the coating and let fully harden over 48 hours or let it air dry in a clean environment.