Main window
The Orc-GUI main window contains:
- A menu bar (File / View / Tools / Help)
- A toolbar with quick-access buttons for common actions
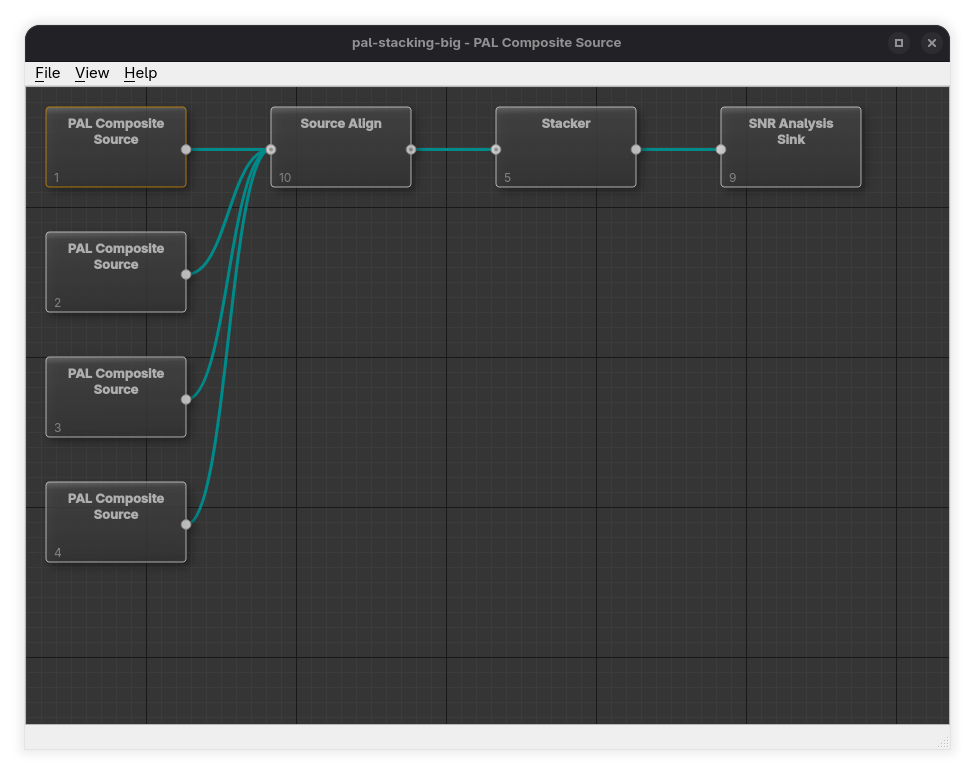
- A central processing graph editor where you build your pipeline using stages and connections
- A status bar that shows short messages about what the application is doing
Toolbar
Directly beneath the menu bar is a toolbar with buttons for the most common actions. Each button mirrors a menu item, so the menus remain available as well.
| Button | Does the same as | Notes |
|---|---|---|
| Arrange to grid | View → Arrange DAG to Grid | Tidies the graph into a left-to-right grid. |
| Show preview | View → Show Preview | Opens the Preview window, or brings it to the front if it is already open. Disabled until a project is loaded. |
| Theme | Tools → Themes | A single button that cycles the theme in the order Auto → Light → Dark. Its icon shows the current mode — a half-disc for Auto, a sun for Light, and a crescent moon for Dark — and stays in sync with the Tools → Themes submenu. |
You can hide or show the toolbar with View → Show Toolbar.
Menu Bar
File Menu
New Project…
Creates a new, empty project.
When you choose File → New Project…, Orc-GUI asks you to select a project type:
- NTSC Composite
- NTSC YC
- PAL Composite
- PAL YC
- PAL-M Composite
- PAL-M YC
You can also choose the project's amplitude display unit (IRE, millivolts, or 10-bit samples; the default is 10-bit samples), which is used by dialogs such as the Line Scope.
A new project starts with an empty graph (no stages are added automatically). You add stages yourself in the graph editor.
Quick Project…
Creates a ready-to-run starter project from an existing capture.
When you choose File → Quick Project…, Orc-GUI asks you to select a video file:
.tbc(composite TBC).tbcc/.tbcy(YC TBC; requires both files as a pair).composite(composite CVBS).y/.c(YC CVBS; requires both files as a pair)
Orc-GUI then looks for the associated metadata alongside the file:
<base>.tbc.dbfor TBC captures (legacy<base>.tbc.jsonmetadata is accepted with a warning)<base>.metafor CVBS captures
If the metadata file is missing, the quick project cannot be created.
What Quick Project sets up for you:
- Detects whether the capture is PAL, NTSC, or PAL-M from the metadata
- Adds the appropriate source stage for the detected system and input type
-
Reads the decoder recorded in the metadata and builds the pipeline to match:
-
ld-decode sources get a Dropout Correction stage between the source and the Video Sink (
source → dropout correction → video sink). When the source has an EFM sidecar, an EFM Decoder Sink is also added and fed from the Dropout Correction stage's output. - All other sources (for example vhs-decode) are connected straight from the source stage to the Video Sink stage. Captures with only legacy JSON (
.tbc.json) metadata carry no reliable decoder identity and are always treated as non-ld-decode. - Adds a Video Sink stage (FFmpeg output mode by default)
-
If found, automatically attaches optional files next to the capture:
-
<base>.pcm <base>.efm
After creating a quick project, you should usually:
- Open Stage Parameters on the Video Sink stage to set the output path and mode, or use its FFmpeg Preset Config stage tool to apply an export preset
- Use File → Save Project As… to save the new project (quick projects start “unsaved”)
Open Project…
Opens an existing .orcprj project file.
Save Project
Saves the current project.
If the project has never been saved before, Orc-GUI will prompt you to use Save Project As….
Save Project As…
Saves the current project under a new filename.
Edit Project…
Edits project-level details (such as name/description). This is enabled only when a project is loaded.
Quit
Exits the application.
View Menu
Show Preview
Opens the Preview window (if a project is loaded), or brings it to the front if it is already open. This is where you can view decoded output for the currently selected stage.
Show Preview on Selection
A toggle.
When enabled, Orc-GUI automatically shows the Preview window when you select a stage in the graph editor.
Arrange DAG to Grid
Automatically lays out the graph in a tidy left-to-right grid based on stage order.
Use this when your graph becomes messy after adding or moving stages.
Show Toolbar
A toggle that hides or shows the toolbar beneath the menu bar.
Tools Menu
Plugin Manager…
Opens the Plugin Manager, which lists the registered stage plugins (ID, path, version, source, and enabled state) and lets you add, remove, enable, and disable them.
- Add Plugin… registers a new plugin, either from a local plugin file or from a GitHub releases URL. Remote plugins are downloaded automatically. Adding a plugin is your consent for it to run: plugin binaries execute as native code, so only add plugins from sources you trust.
- Remove deletes the selected plugin from the registry (core plugins cannot be removed).
- The Enabled checkbox shows whether a plugin will load at the next application start. For entries that were placed in the registry outside of Orc-GUI (for example, a hand-edited registry file), the checkbox appears unchecked until you enable them — ticking it marks the plugin as trusted and enables it.
Registry changes take effect on the next application launch; the dialog offers a restart when you close it after making changes.
Themes
Chooses the user-interface theme, applied immediately:
- Auto follows the operating system's light/dark setting and tracks changes to it while the application is running.
- Dark and Light force the respective theme regardless of the OS setting.
The choice overrides the --theme command-line option and is remembered between runs. The same modes can be cycled quickly from the theme button on the toolbar.
Help Menu
User Guide…
Opens this user guide.
About Orc GUI…
Shows version/about information.
Graph Editor Basics
The graph editor is the central workspace where you build your processing pipeline using:
- Stages (boxes)
- Connections (lines between stage ports)
Adding Stages
To add a stage:
- Right-click on empty space in the graph editor
- Choose Add Stage
-
Pick a stage from one of the categories:
-
Source
- Transform
- Sink (Core)
- Sink (Analysis)
- Sink (3rd party)
Orc-GUI filters the available stages to match your project’s video system (PAL/NTSC/PAL-M). For source stages it also filters by input type (Composite vs YC).
The new stage is placed where you clicked.
Creating Connections
To connect stages:
- Drag from an output port on one stage to a compatible input port on another stage
Connections represent the flow of data through your pipeline.
Selecting Stages and Connections
- Click a stage to select it
- Click a connection line to select the connection
To select multiple items, use standard multi-select gestures (depending on platform):
- Hold Shift or Ctrl/Cmd while clicking additional stages
- Drag a selection rectangle on empty space to select a group
Moving Stages
- Click and drag a stage to reposition it
- With multiple stages selected, dragging one typically moves the selection together
If the layout becomes hard to read, use View → Arrange DAG to Grid.
Renaming a Stage
- Right-click a stage
- Choose Rename Stage…
This changes the label shown on the stage.
Editing Stage Parameters
- Right-click a stage
- Choose Edit Parameters…
Use this to set file paths, decoding options, thresholds, output settings, and other stage-specific behaviour.
Running Stage Tools
Some stages offer interactive tools such as analysis, visualisation, and configuration helpers (e.g. the Disc Mapper, Dropout Editor, or FFmpeg Preset Config).
To access them:
- Right-click a stage
- Open Stage Tools
- Choose an available tool
If no tools apply to the selected stage, the menu will show that none are available.
Triggering a Stage
Sink stages are executed by triggering them.
- Right-click a stage
- Choose Trigger Stage (if enabled)
If an action is unavailable, it is disabled and may show a tooltip explaining why.
Stage Help
Every stage documents itself.
- Right-click a stage
- Choose Help…
This opens the stage's built-in documentation (purpose, parameters, tools, and status-indicator meanings).
Zooming and View Navigation
Zoom In/Out
- Use the mouse wheel over the graph editor to zoom
Zoom is intentionally limited (approximately 70% to 100%) to keep stage rendering readable.
Panning
Panning behaviour depends on platform and the underlying graph widget.
Common gestures include:
- Dragging the background with the middle mouse button
- Trackpad pan gestures
Deleting Stages and Connections
Deleting Connections
To delete a connection:
- Select the connection line
- Press Delete
Deleting Stages
To delete a stage:
- Select the stage
- Press Delete
Important behaviour:
- Orc-GUI blocks deletion of stages that still have connections
- If you try, you will be prompted to disconnect all connections first
Alternative:
- Right-click a stage and choose Delete Stage (only enabled when the stage can be removed)